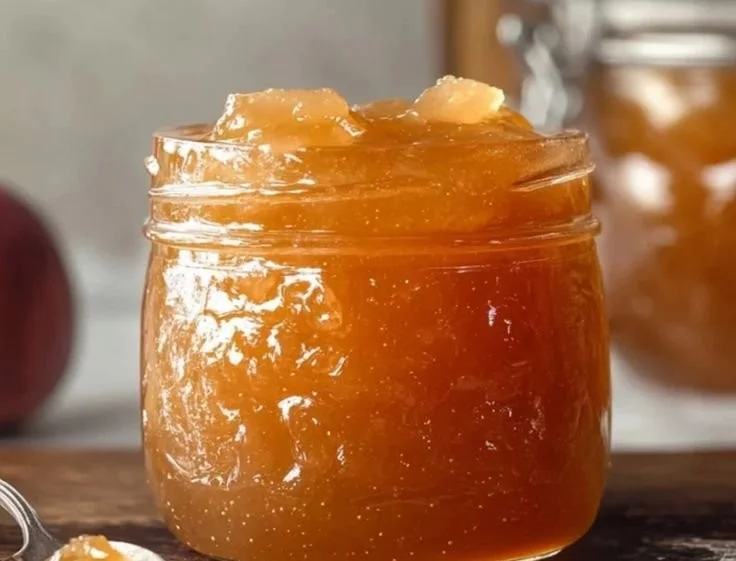
Homemade Apple Jam is a delightful way to preserve the sweet, tart goodness of apples, allowing you to savor their flavor all year long. With just a handful of ingredients and a simple cooking process, this jam is easily achievable for even beginner home cooks. You’ll love having this versatile spread on hand for toast, pastries, or even as a topping for desserts.
{image_template}
Why You’ll Love Homemade Apple Jam
- Simple Ingredients: This jam requires just a few pantry staples, making it budget-friendly and easy to whip up without a long shopping list.
- Deliciously Versatile: Use it on toast, pancakes, or yogurt, or incorporate it into desserts for an extra layer of flavor.
- Great for Meal Prep: Make a batch and can it, so you always have a homemade option ready for breakfast or snacks.
- Perfect for Gifting: A jar of homemade apple jam makes a thoughtful present for friends and family, especially during the holiday season.
- Seasonal Enjoyment: Apples are a fall favorite, but with canning, you can enjoy this jam anytime.
Recipe Overview
- Prep Time: 10 minutes
- Cook Time: 20 minutes
- Total Time: 30 minutes
- Servings: Makes approximately 4 cups
- Difficulty Level: Easy
Ingredients You’ll Need for Homemade Apple Jam
- 4 cups apples, peeled and diced
- 1 cup sugar
- 1/4 cup lemon juice
- 1 teaspoon cinnamon
- 1/2 teaspoon nutmeg
- 1/4 cup water
Notes:
- Apples: Choose a mix of sweet and tart apples, like Granny Smith and Honeycrisp, for depth of flavor.
- Sugar: Adjust the sugar depending on your preference for sweetness; brown sugar adds a richer flavor.
- Lemon Juice: Important for both flavor balance and preserving color.
- Spices: You can adjust the cinnamon and nutmeg based on your preference, or experiment with additional spices like cloves for warmth.

How to Make Homemade Apple Jam
- Combine Ingredients: In a large pot, combine the diced apples, sugar, lemon juice, cinnamon, nutmeg, and water.
- Heat the Mixture: Cook over medium heat, stirring often. Continue until the apples soften and the mixture starts to thicken, about 15-20 minutes.
- Mash Apples: Using a potato masher, mash the apples to your desired consistency. If you prefer a chunkier jam, mash less.
- Jar the Jam: While still hot, pour the jam into sterilized jars, leaving some space at the top. This is important for sealing.
- Process the Jars: Seal the jars and process them in a boiling water bath for 10 minutes to ensure safety.
- Cool and Store: Let the jars cool completely and store them in a cool, dark place.
Tips for Success
- Sterilization: Always sterilize your jars before filling them to prevent spoilage.
- Consistency: If the jam is too runny, continue cooking it until it thickens more; if it’s too thick, add a bit of water and simmer briefly.
- Flavor Boost: Consider adding a splash of vanilla extract for added flavor towards the end of cooking.
- Monitoring: Keep an eye on the mixture as it cooks; stirring frequently prevents sticking and burning.
Easy Variations
- Spiced Apple Jam: Add a pinch of cloves or ginger for extra warmth.
- Fruit Blend: Mix in other fruits, like pears or cranberries, for a unique flavor profile.
- Sugar-Free Option: Use a sugar substitute specifically designed for canning.
- Citrusy Twist: Incorporate zest from an orange or lime for a bright, fresh flavor.
What to Serve with Homemade Apple Jam: A Simple Guide to Canning
- Toast or English Muffins: Spread it generously as a morning treat.
- Pancakes and Waffles: Drizzle over breakfast staples for a sweet enhancement.
- Cheese Boards: Pair with cheeses for a sweet-savory combination.
- Ice Cream or Yogurt: Use as a topping for desserts, adding flavor and moisture.
- Pastries: Fill your pastries or croissants with a spoonful of apple jam for a delightful surprise.
Storage and Reheating
- Refrigerator: Store opened jars in the fridge for up to 3 weeks.
- Freezer Storage: If not canning, you can freeze the jam for up to 6 months in airtight containers.
- Reheating: Gently reheat in a saucepan over low heat or microwave in short bursts until warm, stirring in between to preserve the texture.
- Texture Preservation: To maintain the jam’s consistency, avoid boiling after it’s cooled.
Common Mistakes to Avoid
- Using Non-Sterilized Jars: This can lead to spoilage; always sterilize jars before filling.
- Ignoring Consistency: If the jam is undercooked, it may not set. Cook until thick.
- Forgetting to Stir: Frequent stirring during cooking prevents burning and ensures even cooking.
- Not Processing Jars: Skipping this step can lead to spoilage; always follow safe canning practices.
Homemade Apple Jam: Background & Cultural Inspiration
Homemade apple jam is steeped in tradition, often passed down through generations as a way to preserve the fall harvest. In various cultures, making jam signifies the joy of harvesting fruit and the practice of preparing for the winter months. In the United States, apple picking is a cherished autumn activity, and turning those apples into jam is a natural extension of that experience. Many families have their own recipes, often personalized over time with unique spices or additional fruits.
Frequently Asked Questions
Can I use frozen apples for this recipe?
Yes, frozen apples can be used. Just make sure to thaw and drain any excess water before cooking.
How long does this jam last?
Homemade apple jam can last up to one year if properly canned and stored in a cool, dark place. Once opened, store it in the fridge for about three weeks.
Can I substitute the sugar?
Absolutely! You can use honey or a sugar substitute specifically designed for canning, but note that this may slightly change the flavor and texture.
What consistency should my jam be?
Homemade jam typically has a spreadable consistency. If it feels too runny after cooling, it may need additional cooking time.
Can I can this jam?
Yes, this recipe is designed for canning. Just follow safe canning practices to ensure it maintains freshness for long-term storage.
Final Thoughts
Making Homemade Apple Jam is a rewarding kitchen project that brings the essence of autumn into your home. With its simple recipe and delightful flavor, this jam is perfect for breakfast or as a sweet addition to your favorite dessert. Whether you keep it for your family or share it as a gift, this apple jam is sure to be a hit. Give it a try, and enjoy the delightful taste of homemade goodness!
PrintHomemade Apple Jam
A delightful way to preserve the sweet, tart goodness of apples, this homemade apple jam is perfect for toast, pastries, and desserts.
- Prep Time: 10
- Cook Time: 20
- Total Time: 30
- Yield: 4 cups
- Category: Condiment
- Method: Canning
- Cuisine: American
- Diet: Vegetarian
Ingredients
- 4 cups apples, peeled and diced
- 1 cup sugar
- 1/4 cup lemon juice
- 1 teaspoon cinnamon
- 1/2 teaspoon nutmeg
- 1/4 cup water
Instructions
- Combine the diced apples, sugar, lemon juice, cinnamon, nutmeg, and water in a large pot.
- Heat over medium heat, stirring often until the apples soften and the mixture starts to thicken, about 15-20 minutes.
- Mash the apples to your desired consistency with a potato masher.
- Jar the jam into sterilized jars, leaving some space at the top.
- Process the jars in a boiling water bath for 10 minutes.
- Cool the jars completely and store them in a cool, dark place.
Notes
Choose a mix of sweet and tart apples for depth of flavor. Adjust sugar based on preference for sweetness; brown sugar adds richness.