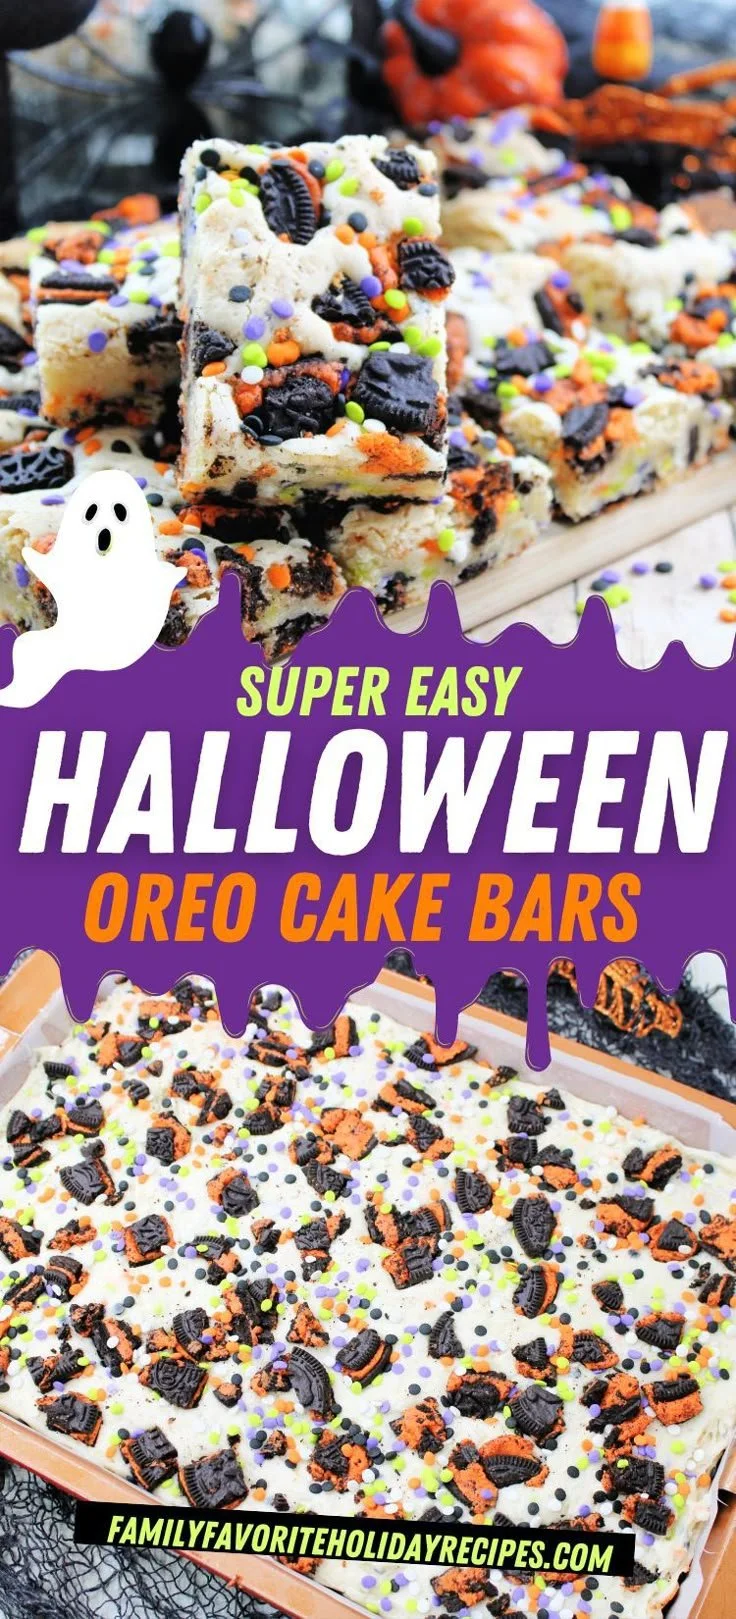
Making Easy Halloween Oreo Cake Bars adds a fun twist to your dessert table during the spooky season. These bars are not only incredibly simple to prepare, but they also bring a delicious combination of chocolate flavors and colorful sprinkles, making them perfect for gatherings, parties, or simply satisfying a sweet craving. With minimal ingredients and straightforward steps, you’ll find these treats are worth every bite.
Why You’ll Love Easy Halloween Oreo Cake Bars
- Quick to Make: Whip these up in no time, making them excellent for last-minute gatherings or when you’re short on time.
- Family-Friendly: Kids and adults alike will love the festive colors and flavors, making these treats a hit for everyone.
- Minimal Ingredients: With just a few pantry staples and some Halloween Oreos, you can create something special without a long shopping list.
- Customizable Fun: The recipe allows for plenty of variations to suit your tastes or dietary preferences.
- Perfect for Sharing: Cut them into bars for easy serving, making them great for parties, potlucks, or treat exchanges.
Recipe Overview
- Prep Time: 10 minutes
- Cook Time: 20-25 minutes
- Total Time: 30-35 minutes
- Servings: 12
- Difficulty Level: Easy
Ingredients You’ll Need for Easy Halloween Oreo Cake Bars
- 12 Halloween Oreos, crushed
- 1 cup all-purpose flour
- 1/2 cup sugar
- 1/4 cup unsweetened cocoa powder
- 1/2 teaspoon baking powder
- 1/4 teaspoon salt
- 1/2 cup butter, melted
- 2 large eggs
- 1 teaspoon vanilla extract
- 1/2 cup colorful sprinkles
Notes:
- Feel free to substitute regular Oreos if you can’t find Halloween-themed ones.
- The butter adds richness; for a dairy-free option, you can use a plant-based butter.
- You can adjust the amount of sprinkles to your preference or replace them with chocolate chips.

How to Make Easy Halloween Oreo Cake Bars
- Preheat the Oven: Set your oven to 350°F (175°C). Grease a baking dish or line it with parchment paper for easy removal.
- Mix Dry Ingredients: In a large bowl, combine the crushed Halloween Oreos, flour, sugar, cocoa powder, baking powder, and salt. Stir until well mixed.
- Prepare Wet Ingredients: In another bowl, whisk together the melted butter, eggs, and vanilla extract until fully combined.
- Combine Ingredients: Pour the wet ingredients into the dry mixture. Gently stir until just combined to avoid overmixing.
- Add Sprinkles: Fold in the colorful sprinkles, making sure they are evenly distributed throughout the batter.
- Spread in Dish: Pour the batter into the prepared baking dish, spreading it evenly across the bottom.
- Bake: Place the dish in the oven and bake for 20-25 minutes. Check for doneness by inserting a toothpick in the center; it should come out clean.
- Cool and Serve: Allow to cool in the dish for a few minutes before transferring to a wire rack to cool completely. Once cool, cut into bars and enjoy!
Tips for Success
- Don’t Overmix: Mix just long enough to combine ingredients. This keeps the bars tender and prevents them from becoming tough.
- Avoid Soggy Bars: Ensure your baking dish is well-greased or lined with parchment to keep the bottom from getting soggy.
- Check Doneness: Ovens can vary, so start checking around the 20-minute mark. Bars should be set but not dry.
- Customize Sprinkle Amount: Add more or fewer sprinkles based on your preference for color and texture.
Easy Variations
- Cookie Swap: Use seasonal cookies like pumpkin spice or peppermint-flavored Oreos for a festive twist.
- Nutty Addition: Add 1/2 cup of chopped nuts or seeds for added crunch.
- Dairy-Free Variation: Substitute the butter with coconut oil and use dairy-free eggs or flax eggs to make it vegan.
- Frosting: Top the cooled bars with a simple glaze made from powdered sugar and milk for added sweetness.
What to Serve with Easy Halloween Oreo Cake Bars
- Vanilla Ice Cream: The creaminess of ice cream complements the chocolatey flavor of the bars.
- Whipped Cream: A dollop of whipped cream can add a light and airy texture to each bite.
- Hot Chocolate: Serve these bars with a warm mug of hot cocoa for a cozy pairing.
- Fruit Salad: The freshness of fruit can balance the richness of the cake bars nicely.
Storage and Reheating
- Refrigerator Storage: Store the bars in an airtight container in the refrigerator for up to one week.
- Freezer Storage: Freeze individual bars wrapped in plastic wrap and placed in a freezer-safe bag for up to three months.
- Reheating: Microwave a single bar for 10-15 seconds to warm it up without losing its texture.
- Meal Prep Note: These bars can be made ahead of time for gatherings; just store them as indicated.
Common Mistakes to Avoid
- Not Crushing Oreos Enough: Ensure the Oreos are crushed into small pieces; large chunks could affect the texture of the bars.
- Skipping the Cooling Step: Allowing bars to cool properly enhances their texture and makes cutting easier.
- Overbaking: Keep an eye on your bars to prevent them from drying out; they should be moist and fudgy.
Easy Halloween Oreo Cake Bars: Background & Cultural Inspiration
The tradition of enjoying spooky treats around Halloween has its roots in various cultural customs celebrating the fall season. Treats like these Oreo cake bars combine elements of playful creativity with traditional baking. Using festive ingredients like Halloween Oreos brings a sense of fun and nostalgia, reflecting the joy of celebrating with friends and family. These bars fit perfectly into this tradition, making them a delightful addition to any Halloween celebration.
Frequently Asked Questions
Can I make this recipes ahead of time?
Yes, you can prepare these bars a day in advance. Just store them in an airtight container to keep them fresh.
Can I add more chocolate flavor?
Absolutely! You could incorporate chocolate chips into the batter for an extra chocolatey delight.
How can I make these gluten-free?
Substitute regular flour with a gluten-free all-purpose blend to make the bars gluten-free.
Are they suitable for a crowd?
Yes, these bars are easy to cut into portions, making them great for serving a large group at parties.
What if I don’t have cocoa powder?
You can omit the cocoa powder, but the flavor will not be the same. If you want a vanilla version, you might want to add a bit more sugar.
Final Thoughts
Easy Halloween Oreo Cake Bars are not just a treat but a festive culinary adventure perfect for the spooky season. With their simple preparation and customizable nature, they invite creativity while ensuring a delicious result. Whether you’re hosting a Halloween party or looking for a sweet snack, these bars are sure to impress. Try making them for your next gathering, and watch them disappear!
PrintEasy Halloween Oreo Cake Bars

A fun and delicious twist on dessert for Halloween, these Oreo cake bars are simple to prepare and perfect for gatherings.
- Prep Time: 10 minutes
- Cook Time: 25 minutes
- Total Time: 35 minutes
- Yield: 12 servings
- Category: Dessert
- Method: Baking
- Cuisine: American
- Diet: Vegetarian
Ingredients
- 12 Halloween Oreos, crushed
- 1 cup all-purpose flour
- 1/2 cup sugar
- 1/4 cup unsweetened cocoa powder
- 1/2 teaspoon baking powder
- 1/4 teaspoon salt
- 1/2 cup butter, melted
- 2 large eggs
- 1 teaspoon vanilla extract
- 1/2 cup colorful sprinkles
Instructions
- Preheat the oven: Set your oven to 350°F (175°C) and grease a baking dish or line it with parchment paper.
- Mix dry ingredients: Combine crushed Halloween Oreos, flour, sugar, cocoa powder, baking powder, and salt in a large bowl.
- Prepare wet ingredients: Whisk together melted butter, eggs, and vanilla extract in another bowl.
- Combine ingredients: Pour wet ingredients into the dry mixture and gently stir until just combined.
- Add sprinkles: Fold in the colorful sprinkles evenly into the batter.
- Spread in dish: Pour the batter into the prepared baking dish, spreading it evenly across the bottom.
- Bake: Place the dish in the oven and bake for 20-25 minutes, checking for doneness with a toothpick.
- Cool and serve: Allow to cool before cutting into bars and enjoying.
Notes
Feel free to substitute regular Oreos if Halloween-themed ones are unavailable. For a dairy-free option, you can use plant-based butter.