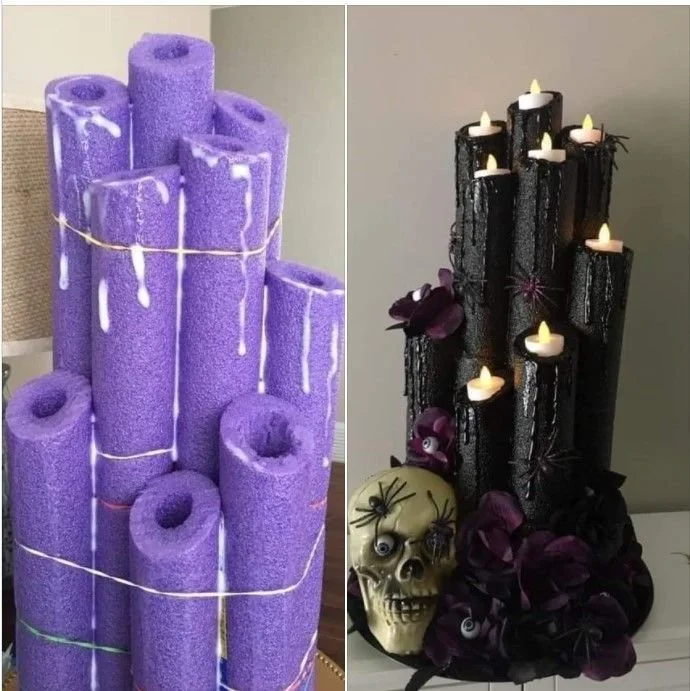
Making Halloween Candles is a delightful way to celebrate the spooky season while adding a warm, festive glow to your home. This recipe is fun and easy to follow, perfect for families and beginners looking to create a seasonal atmosphere. With just a few simple ingredients, you can craft beautiful candles that are both decorative and practical.
Why You’ll Love Halloween Candles
- Festive Decor: Halloween Candles add a charming touch to your home décor, creating a warm ambiance that’s perfect for Halloween parties or cozy evenings.
- Customizable: You can choose colors, scents, and decorations to match your personal style or theme, making each candle truly unique.
- Fun Activity: This project is a great way to involve kids or friends, making it a fun hands-on activity that can be enjoyed together.
- Great Gifts: Handmade candles make thoughtful gifts for friends and family, especially during Halloween gatherings or events.
- Simple Process: The steps are straightforward, so even if you’re a beginner, you’ll find this recipe easy to manage without any special skills.
Recipe Overview
- Prep Time: 15 minutes
- Cook Time: 30 minutes
- Total Time: 45 minutes
- Servings: Depends on jar sizes (approximately 4-6 candles)
- Difficulty Level: Easy
Ingredients You’ll Need for Halloween Candles
- Wax (Soy or Paraffin): This is the base for the candles. Soy wax is more eco-friendly, while paraffin is typically less expensive and has good scent throw.
- Wicks: Choose the appropriate size for your containers to ensure a steady and even burn.
- Colorants: Candle dyes available at craft stores help you achieve your desired spooky colors.
- Fragrance Oils (optional): Choose seasonal scents like pumpkin spice, cinnamon, or apple to enhance the experience.
- Containers: Mason jars or silicone molds can be used to form your candles. Choose shapes that reflect Halloween, like pumpkins or ghosts.
- Decorative Elements (optional): Items like glitter, dried leaves, or mini decorations can be added to make your candles extra festive.

How to Make Halloween Candles
-
Melt the Wax:
Use a double boiler to melt your wax. Fill the bottom pot with water and put the wax in the top pot. Stir occasionally until fully melted, reaching about 180°F to 190°F for optimal pouring. -
Prepare the Containers:
While the wax melts, attach your wicks to the bottom of your containers using a dab of melted wax or a wick sticker. Ensure they are centered and secure. -
Add Color and Fragrance:
Once the wax is melted, add colorants slowly, stirring until you achieve the desired hue. If using fragrance oils, add them now according to the manufacturer’s instructions (usually 1 oz per pound of wax). -
Pour the Wax:
Carefully pour the wax into the containers, filling them to the desired level. Leave a small space at the top to allow for settling. -
Secure the Wicks:
To ensure the wick stays straight, use a pencil and lay it across the top of the container, resting the wick in the center. Allow the candles to cool and harden completely, which can take about 30 minutes. -
Trim the Wicks:
Once the candles are fully hardened, trim the wicks to about 1/4 inch above the surface to ensure a proper burn.
Tips for Success
- Use a thermometer: Consistently check the wax temperature to avoid overheating, which can cause discoloration or unpleasant smells.
- Choose the right wick: Ensure your wick size matches your container for an even burn and minimal soot.
- Add color gradually: Start with a small amount of colorant and mix well; you can always add more until you achieve your desired look.
- Keep the area ventilated: If using fragrance oils, ensure your workspace is well-ventilated to prevent overwhelming scents.
- Allow to cure: Let your candles cure for at least 48 hours after pouring to enhance scent throw and overall quality.
Easy Variations
- Scent Adjustments: Swap seasonal scents for floral or fresh fragrances to create different vibes, perfect for year-round use.
- Layered Candles: Pour different layers of colored wax for a multi-colored effect, creating a stunning visual impact.
- Shape Changes: Use different molds, like skulls or bats, for fun and festive shapes.
- Decorative Finishes: Add dried flowers or herbs on top of your candles before they harden for an added decorative touch.
- Floating Candles: Use larger, flat containers to create floating candles for a unique centerpiece.
What to Serve with Halloween Candles
- Pumpkin Soup: The warmth and bowl’s hues pair nicely with glowing candlelight; a perfect fall meal.
- Apple Cider: Serve hot, spiced apple cider alongside your candles for a cozy drink option.
- Caramel Apples: A sweet treat that complements the autumn theme and enhances the overall festive atmosphere.
- Ghostly Cupcakes: Create cupcakes that match your candle colors for a delightful dessert that delights both the eyes and taste buds.
- Cheese Board: A savory selection of cheeses and seasonal fruits can serve as a savory counterpoint to the sweet treats.
Storage and Reheating
- Refrigerator Storage: Store any leftover wax in an airtight container in the fridge for future use.
- Freezer Storage: If you have remaining wax, it can also be placed in a freezer to prolong shelf life.
- Best Reheating Method: Re-melt per the previous instructions, using a double boiler to ensure even heating without burning.
- Preserving Texture: Keep candles away from direct sunlight or heat sources to maintain their appearance and fragrance.
- Meal Prep Note: If planning for gifts, consider preparing candles a few weeks in advance to allow for curing.
Common Mistakes to Avoid
- Overheating the Wax: Keep temperatures below 200°F to prevent degradation.
- Ignoring Wick Size: Using an incorrect wick size can lead to uneven burning or excessive soot.
- Pouring Too Fast: Pour at a steady pace to minimize bubbles and ensure a smooth finish.
- Letting the Wax Cool Too Much: Pouring wax when too cool can prevent a proper bond with the wick.
- Insufficient Curing Time: Allow your candles to sit for a few days after making for the best scent and burn quality.
Halloween Candles: Background & Cultural Inspiration
The tradition of candle-making dates back centuries, with origins in ancient civilizations where candles provided light. Over time, they have evolved into decorative and aromatic features in our homes. During Halloween, candles are commonly associated with themes of ghosts, spirits, and folklore, used to create an inviting atmosphere while warding off evil spirits. This craft also resonates with the spirit of DIY culture, where handmade items reflect love and care, making them ideal for festive occasions.
Frequently Asked Questions
Can I use regular crayons as colorants?
Using regular crayons can work in a pinch, but they may affect the fragrance and burn quality. It’s best to use dyes made specifically for candle making.
How long do homemade candles last?
Homemade candles can last for about 1-2 years if stored properly in a cool, dark place.
Can I make these candles scent-free?
Yes, simply skip the fragrance oil step, and you’ll have wonderful candles that are completely unscented.
How can I reuse old candles?
Melt down the leftover wax from old candles and follow the recipe to create new candles. Ensure to filter out any impurities.
Can I use essential oils instead of fragrance oils?
Yes, essential oils can be used, but they might not provide the same strong scent throw as synthetic fragrances. Also, ensure they are safe for candle-making.
Final Thoughts
Making Halloween Candles is a delightful way to embrace the festive spirit of the season while enjoying a creative outlet. The simplicity of this recipe makes it accessible for anyone to try, encouraging you to explore your creativity and personalize your creations. Whether you use them as decorations, gifts, or a special treat for yourself, they’re bound to warm any space and bring a cozy glow to your Halloween celebrations. Enjoy crafting your own unique candles this season!
PrintHalloween Candles
Create beautiful and festive Halloween candles with this simple and fun recipe, perfect for enhancing your seasonal décor.
- Prep Time: 15 minutes
- Cook Time: 30 minutes
- Total Time: 45 minutes
- Yield: 4-6 candles
- Category: Craft
- Method: Crafting
- Cuisine: N/A
- Diet: N/A
Ingredients
- Wax (Soy or Paraffin)
- Wicks
- Colorants (candle dyes)
- Fragrance Oils (optional)
- Containers (Mason jars or silicone molds)
- Decorative Elements (optional like glitter, dried leaves)
Instructions
- Melt the wax using a double boiler until fully melted, reaching 180°F to 190°F.
- Prepare the containers by attaching the wicks to the bottom with a dab of melted wax or a wick sticker.
- Add colorants to the melted wax, stirring until the desired hue is achieved. Add fragrance oils if desired.
- Pour the wax into the containers, leaving some space at the top for settling.
- Secure the wicks with a pencil laid across the top of the container to keep them centered.
- Trim the wicks to about 1/4 inch above the surface once the candles are hardened.
Notes
Check the wax temperature while melting, use the right wick size for your containers, and allow the candles to cure for at least 48 hours for best results.