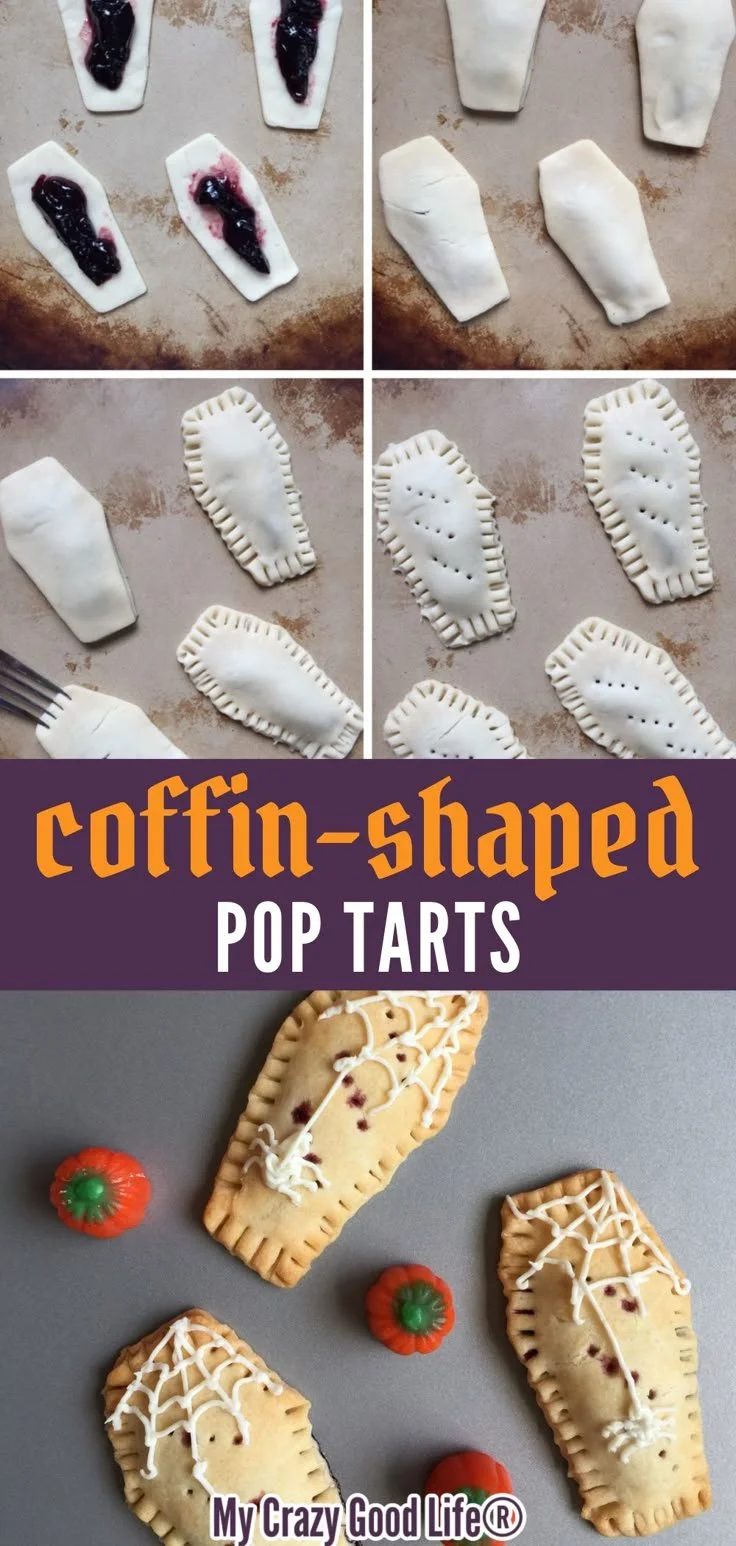
Coffin-shaped homemade Pop Tarts offer a delightful blend of creativity and comfort, perfect for any Halloween celebration. These fun treats are not only delicious but also super easy to make, making them an ideal project for beginner home cooks looking to add a little festive flair to their table.
Why You’ll Love Coffin-Shaped Homemade Pop Tarts
- Fun Presentation: The coffin shape adds a playful touch to your treats, making them a perfect addition to any Halloween gathering.
- Customizable Fillings: Use your favorite fruit jam or pastry filling, allowing everyone to enjoy a flavor they love.
- Quick and Easy: With just a few ingredients and simple steps, you can whip these up in a flash.
- Family-Friendly Activity: Get the kids involved in the kitchen. They’ll love cutting out the shapes and decorating their own Pop Tarts.
- Perfect for Parties: These Pop Tarts are great for sharing. Guests will appreciate the unique twist on a classic pastry.
Recipe Overview
- Prep Time: 15 minutes
- Cook Time: 15-20 minutes
- Total Time: 30-35 minutes
- Servings: 8 Pop Tarts
- Difficulty Level: Easy
Ingredients You’ll Need for Coffin-Shaped Homemade Pop Tarts
- 1 package pie crusts or puff pastry
- 1 cup fruit jam or pastry filling (such as raspberry or chocolate)
- 1 egg (for egg wash)
- Powdered sugar (for icing)
- Food coloring (optional, for decoration)
- Sprinkles (optional, for decoration)

How to Make Coffin-Shaped Homemade Pop Tarts
-
Preheat the Oven
Preheat your oven to 375°F (190°C) to ensure it’s hot enough for even baking. -
Prepare the Dough
Roll out the pie crusts or puff pastry on a lightly floured surface. Use a sharp knife or pastry cutter to cut the dough into coffin shapes, approximately 3 inches wide. -
Add the Filling
Place a spoonful of fruit jam or pastry filling in the center of half of the coffin shapes. Be careful not to overfill, as this can make sealing difficult. -
Seal the Pop Tarts
Top each filled piece with a corresponding coffin shape and press the edges together firmly to seal. You can use a fork to crimp the edges, which helps to ensure they don’t open while baking. -
Add the Egg Wash
Beat the egg in a small bowl and brush it over the tops of the pastries. This will give them a nice golden color when baked. -
Bake the Pastries
Place the sealed pastries on a parchment-lined baking sheet. Bake for 15-20 minutes or until they are golden brown and crisp. -
Cool and Ice
Once baked, let the Pop Tarts cool for a few minutes. Meanwhile, mix powdered sugar with a little water or milk to achieve a drizzling consistency for the icing. If desired, add food coloring to create a fun design. -
Decorate
Drizzle the icing over the cooled Pop Tarts and finish with sprinkles for a festive look. -
Serve and Enjoy!
Your coffin-shaped homemade Pop Tarts are now ready to be enjoyed!
Tips for Success
- Don’t Overfill: Ensure you only add a spoonful of filling. Overfilling can lead to messy pastries.
- Use Cold Dough: For flakier pastries, keep your pie crusts or puff pastry chilled until you’re ready to bake.
- Watch the Baking Time: Ovens can vary, so keep an eye on your pastries to prevent burning.
- Crimp Seals Well: Make sure the edges of your tarts are well sealed to prevent the filling from leaking out during baking.
- Customize Icing: You can also experiment with different flavors of icing or a simple glaze instead of the powdered sugar icing.
Easy Variations
- Different Shapes: Instead of coffin shapes, use cookie cutters to create other spooky shapes like bats or pumpkins.
- Savory Version: Swap out the sweet jam for savory fillings like cheese or seasoned vegetables for a unique twist.
- Chocolate Drizzle: Use melted chocolate instead of icing for a rich, decadent topping.
- Gluten-Free Option: Substitute traditional pie crusts with gluten-free alternatives to accommodate dietary needs.
- Seasonal Flavors: Try using seasonal flavors like pumpkin spice or apple cinnamon for a festive touch.
What to Serve with Coffin-Shaped Homemade Pop Tarts | Fun Halloween Recipe
- Hot Apple Cider: The warmth and sweetness of cider pairs beautifully with the pastries.
- Vanilla Ice Cream: A scoop of ice cream on the side adds a delicious, creamy contrast to the flaky pastries.
- Halloween Punch: A fruity, spooky punch elevates the fun atmosphere of a Halloween party.
- Coffee or Tea: A warm beverage balances the sweetness of the Pop Tarts and provides a comforting touch.
- Chocolate Milk: This classic drink complements the sweet flavors perfectly, making it a hit with kids.
Storage and Reheating
- Refrigerator Storage: Store any leftover Pop Tarts in an airtight container in the refrigerator for up to 3 days.
- Freezer Storage: You can also freeze unbaked pastries by placing them in a single layer on a baking sheet. Once frozen, transfer to a freezer bag for up to 2 months.
- Reheating: To reheat, simply pop them back in the oven at 350°F (175°C) for about 10 minutes, or until warmed through. This keeps the crust crisp.
- Preserving Texture: Avoid microwaving them as that can make the pastry soggy.
Common Mistakes to Avoid
- Underbaking: Ensure they are baked until golden, as this affects both texture and flavor.
- Not Sealing Properly: Failing to seal the edges can result in filling leaking during baking.
- Ignoring Cooling Time: If you frost while they’re still warm, the icing may melt off. Let them cool before decorating.
- Using Soft Dough: If your dough becomes too warm during preparation, it may not hold its shape. Keep it cool.
Coffin-Shaped Homemade Pop Tarts: Background & Cultural Inspiration
Homemade Pop Tarts have a rich history in American kitchens, evolving from a convenient snack food into a canvas for creativity. The coffin shape for these festive pastries draws inspiration from Halloween traditions, where playful, spooky themes come alive. This recipe encourages families to engage in culinary creativity, combining traditional baking with modern fun. The flexibility of fillings allows for adaptation and experimentation, creating a treat that representatives the spirit of the holiday while indulging sweet cravings.
Frequently Asked Questions
Can I make the dough from scratch?
Yes, you can make your own pie crust if you prefer a homemade touch. Just ensure it’s chilled before rolling out.
Can I prepare these in advance?
Absolutely! You can assemble them ahead of time and then bake just before serving. If using frozen pastry, bake them straight from the freezer, adding a few extra minutes to the cooking time.
What type of fillings works best?
Fruit jams, chocolate spreads, or even custard all work well. Choose whatever flavor suits your taste or the occasion.
How can I make them more festive?
Using bright food coloring for icing and fun-shaped sprinkles can enhance their Halloween appeal.
What’s the best way to store leftovers?
Store them in an airtight container in the refrigerator for up to 3 days. You can also freeze them for longer storage.
Final Thoughts
Coffin-shaped homemade Pop Tarts are not just a treat; they are an experience that brings joy and creativity to your kitchen. Perfect for Halloween festivities, these delightful pastries allow for flavour customization and fun decorating, making them a hit with both kids and adults. Give this easy recipe a try, and watch it become a seasonal favorite!
PrintCoffin-Shaped Homemade Pop Tarts
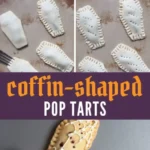
Delight in these coffin-shaped homemade Pop Tarts, perfect for Halloween, with customizable fillings and a fun presentation.
- Prep Time: 15 minutes
- Cook Time: 20 minutes
- Total Time: 35 minutes
- Yield: 8 Pop Tarts
- Category: Dessert
- Method: Baking
- Cuisine: American
- Diet: Vegetarian
Ingredients
- 1 package pie crusts or puff pastry
- 1 cup fruit jam or pastry filling (such as raspberry or chocolate)
- 1 egg (for egg wash)
- Powdered sugar (for icing)
- Food coloring (optional, for decoration)
- Sprinkles (optional, for decoration)
Instructions
- Preheat your oven to 375°F (190°C) to ensure it’s hot enough for even baking.
- Roll out the pie crusts or puff pastry on a lightly floured surface. Use a sharp knife or pastry cutter to cut the dough into coffin shapes, approximately 3 inches wide.
- Place a spoonful of fruit jam or pastry filling in the center of half of the coffin shapes. Be careful not to overfill, as this can make sealing difficult.
- Top each filled piece with a corresponding coffin shape and press the edges together firmly to seal. You can use a fork to crimp the edges, which helps to ensure they don’t open while baking.
- Beat the egg in a small bowl and brush it over the tops of the pastries. This will give them a nice golden color when baked.
- Place the sealed pastries on a parchment-lined baking sheet. Bake for 15-20 minutes or until they are golden brown and crisp.
- Once baked, let the Pop Tarts cool for a few minutes. Meanwhile, mix powdered sugar with a little water or milk to achieve a drizzling consistency for the icing. If desired, add food coloring to create a fun design.
- Drizzle the icing over the cooled Pop Tarts and finish with sprinkles for a festive look.
- Your coffin-shaped homemade Pop Tarts are now ready to be enjoyed!
Notes
Customize filling and icing to suit your taste. Keep dough cold for the best texture.